
I got some free time to share this project, the deployment of a workload manager to ease the management of my research group’s cluster of GPUs.
In this project, we are going to deploy an experimental cluster in the Microsoft’s Cloud Platform Azure. The requirements for this cluster are basically the implementation of the job management system based on queues and shared directories that allow every node in the cluster to access information within the system.
We will evaluate the use of two tools regarding these functionalities: the Network File System Protocol from Linux (NFS) for sharing files and directories, and the job management system called “Simple Linux Utility for Resource Management” (SLURM). This cloud deployment will be the workbench to practice with these tools for the future use in a real environment.
This document aims to be a tutorial of the whole process, from the creation of Virtual Machines (VM) to the configuration of all the required elements, concluding with an example of a task running on the cluster. In the last part, we will include one option to extend the size of the cluster easily. I’ll split this post into three different parts: Deployment, NFS installation and SLURM installation. There will be parts that could have been done automatically, but I did them manually to illustrate the whole process.
System architecture
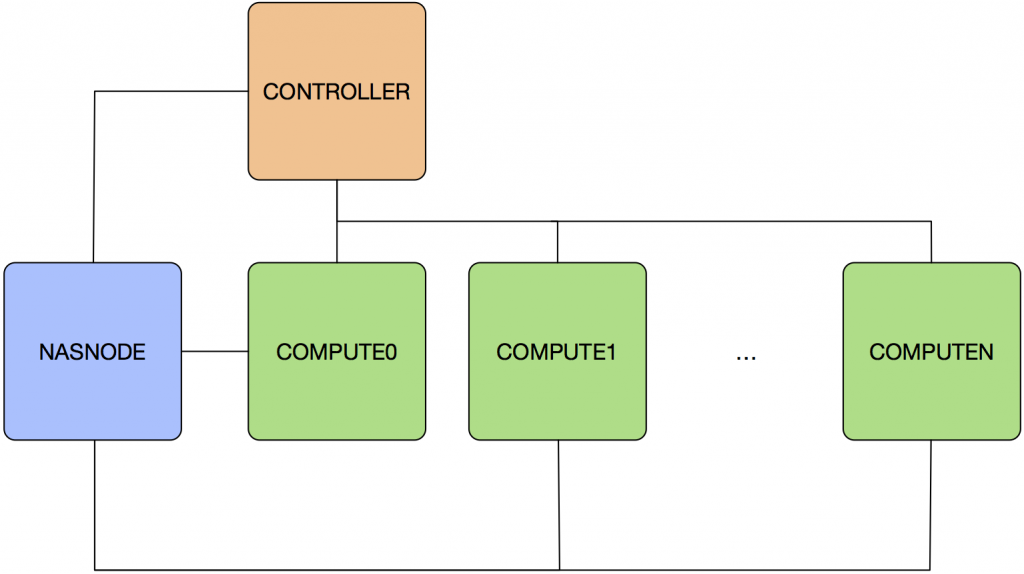
First of all, we need to deploy the instances that we will require in Azure, the following section will describe the steps for doing this. The structure of the system that we will be deploying during this tutorial is represented in the following figure:
Creating and deploying an instance on Azure
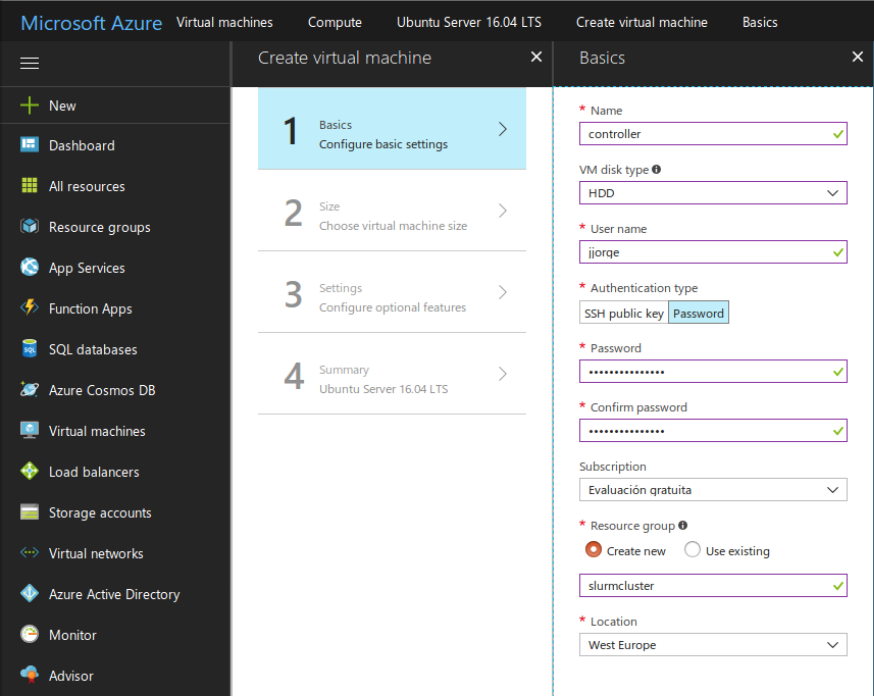
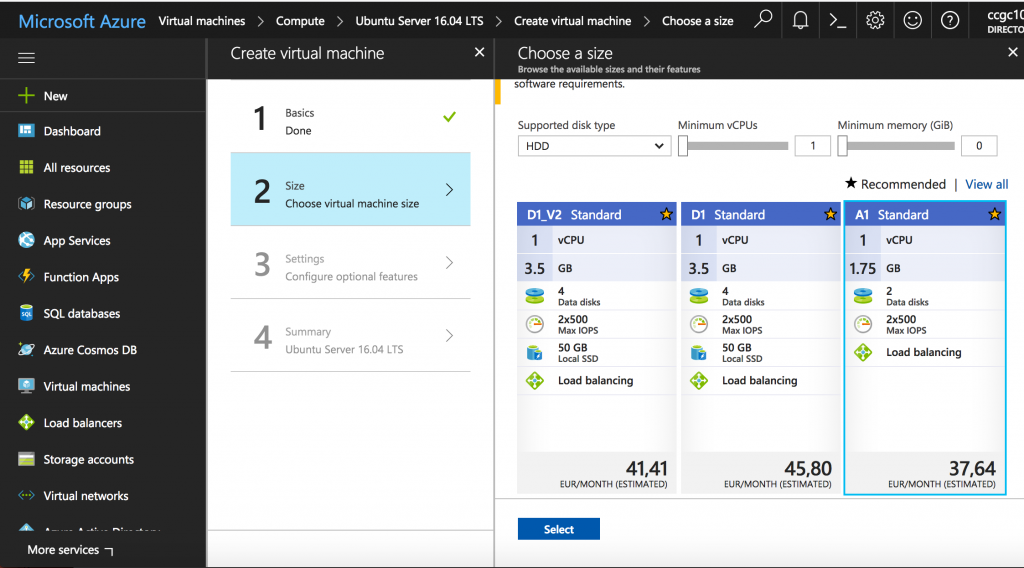
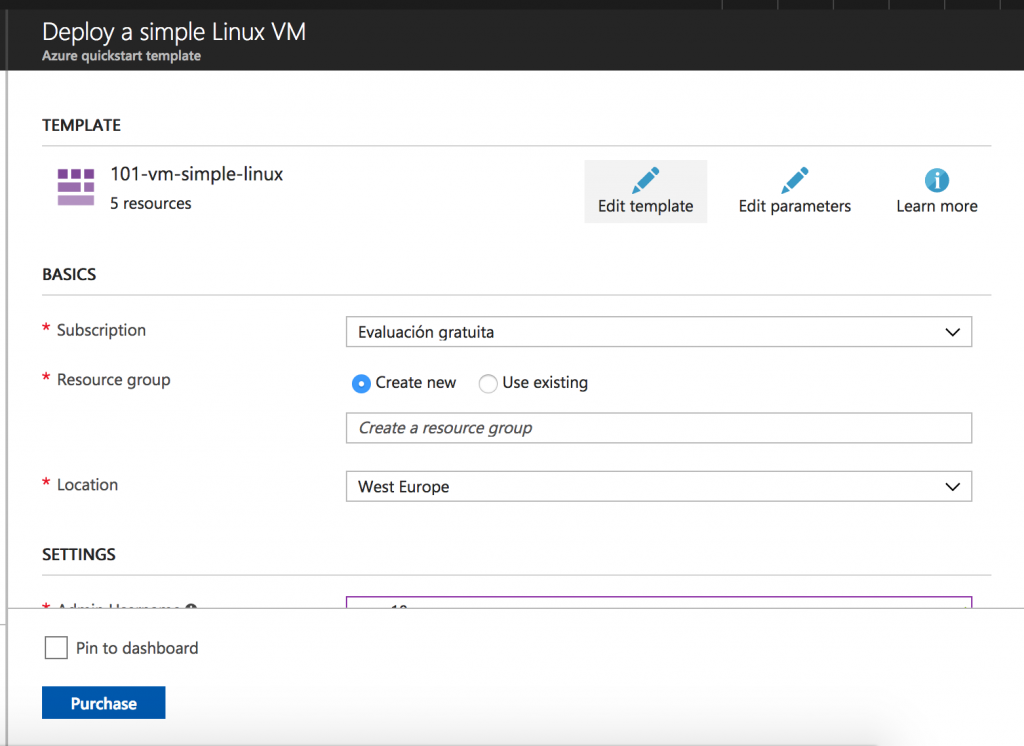
The information required to create the controller is summarized in the following screenshots:

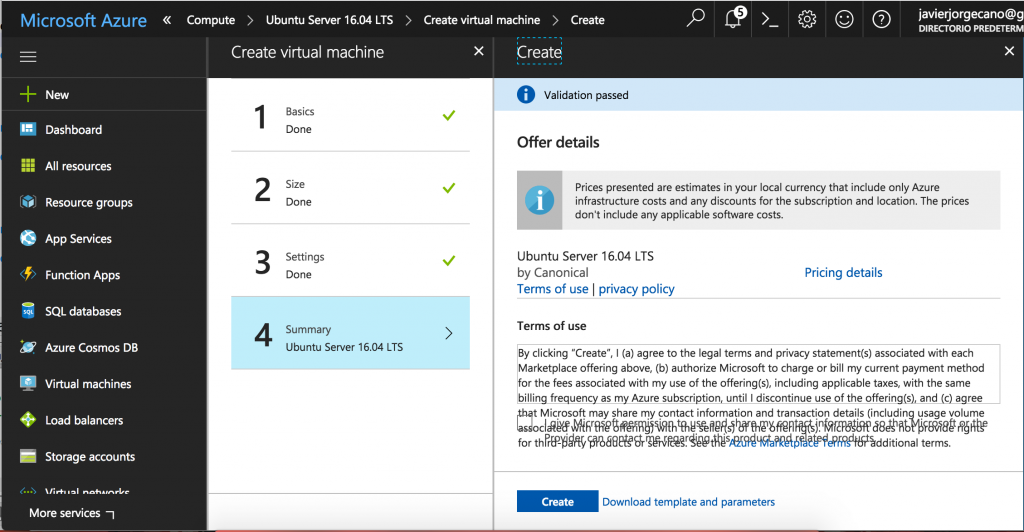
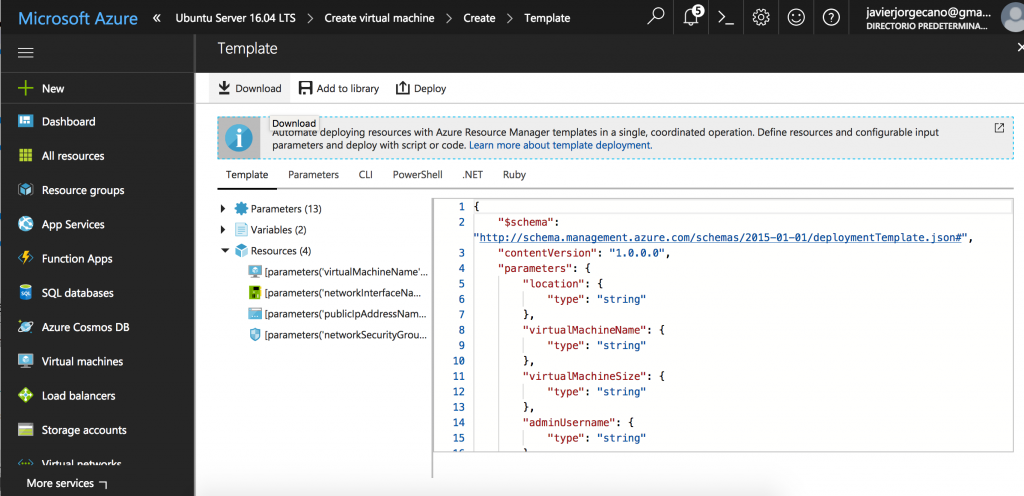
Finally, this image shows the last step that allows us to export the template containing all the required files to deploy similar instances later.
Deploying with templates
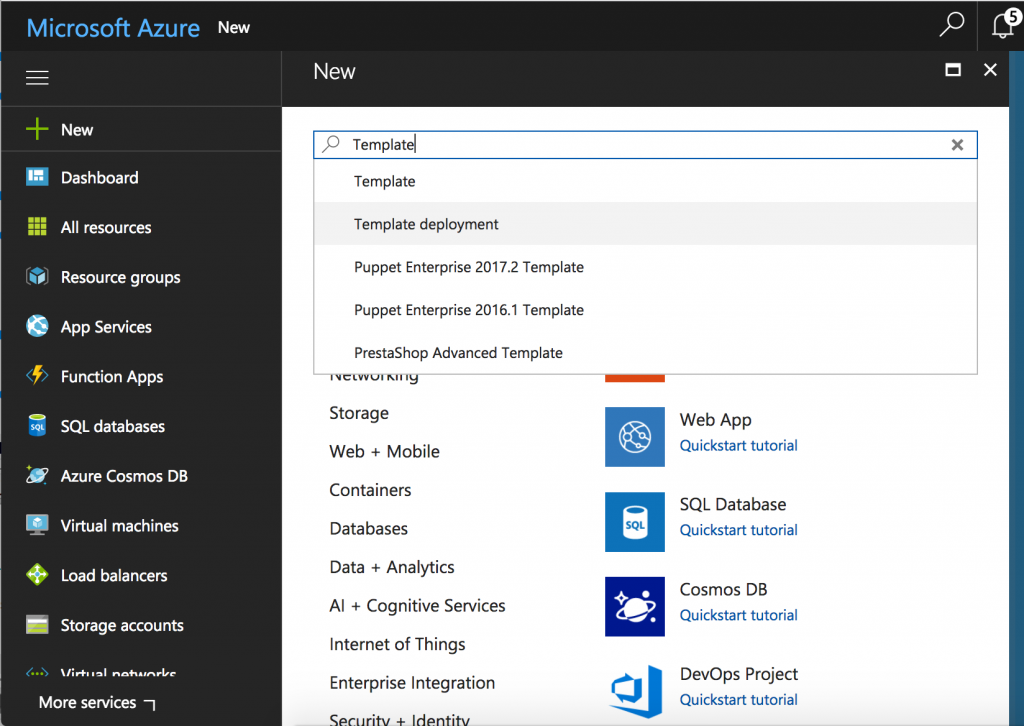
Considering that we have the template, the rest of the nodes will be deployed using it. We have to click on the “+ New” button and input the text “Template deployment” to show this option in the search results. We choose this option from the drop-down menu. The following screen shows the interface that we get after clicking on it.
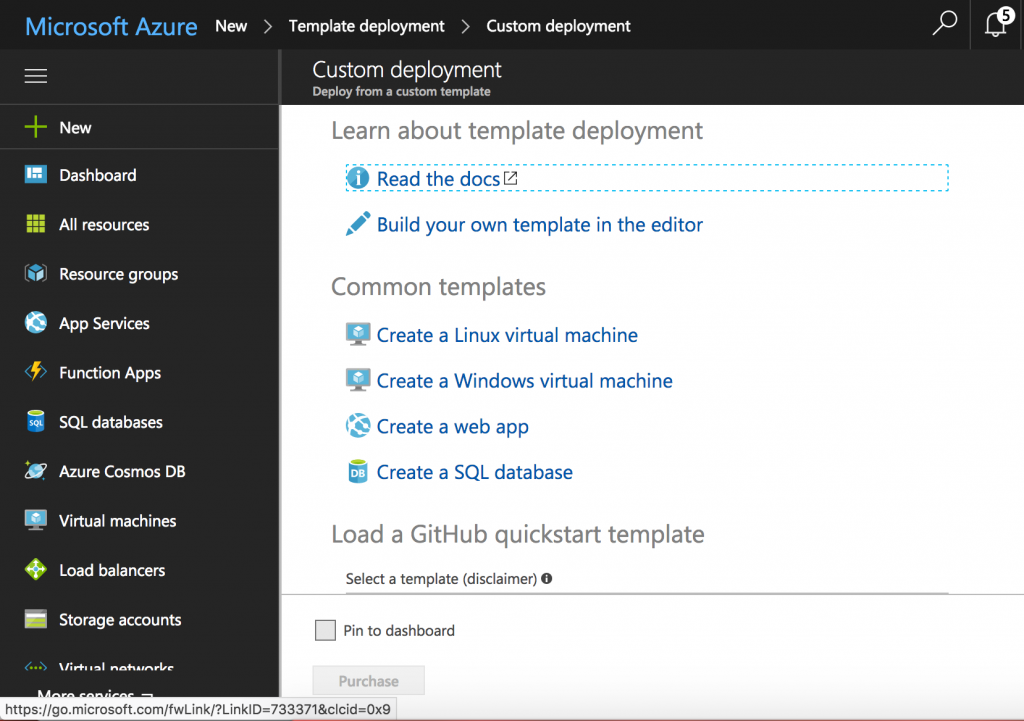
After clicking on “Create”, we have to choose “Create a Linux Virtual Machine” in the interface that is represented in the image below:
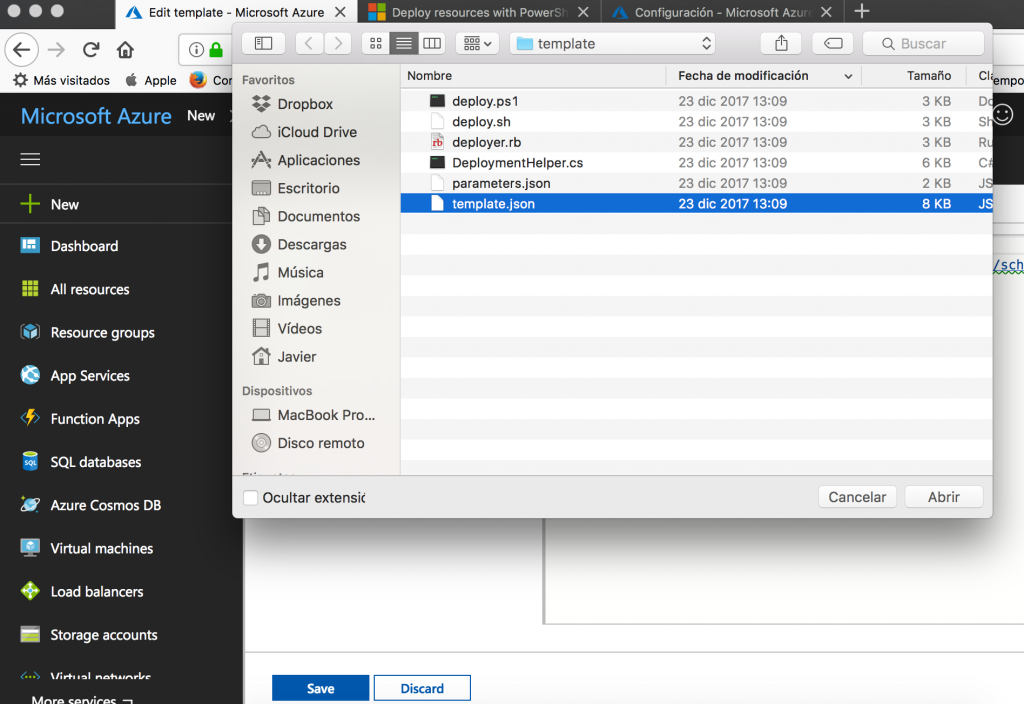
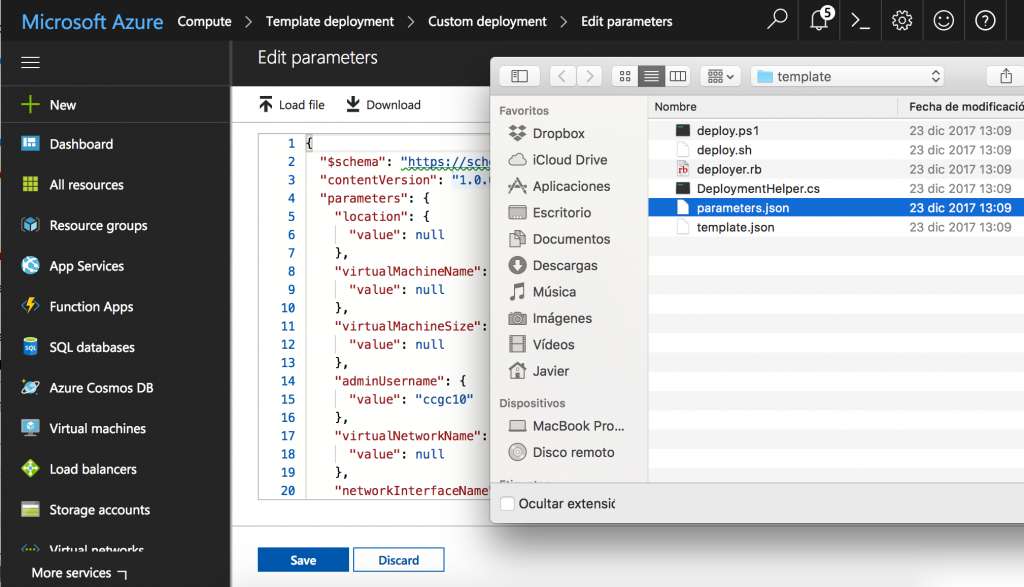
Now, we should load both template.json and parameters.json from the compressed file that we downloaded before. The following screens illustrate these steps.
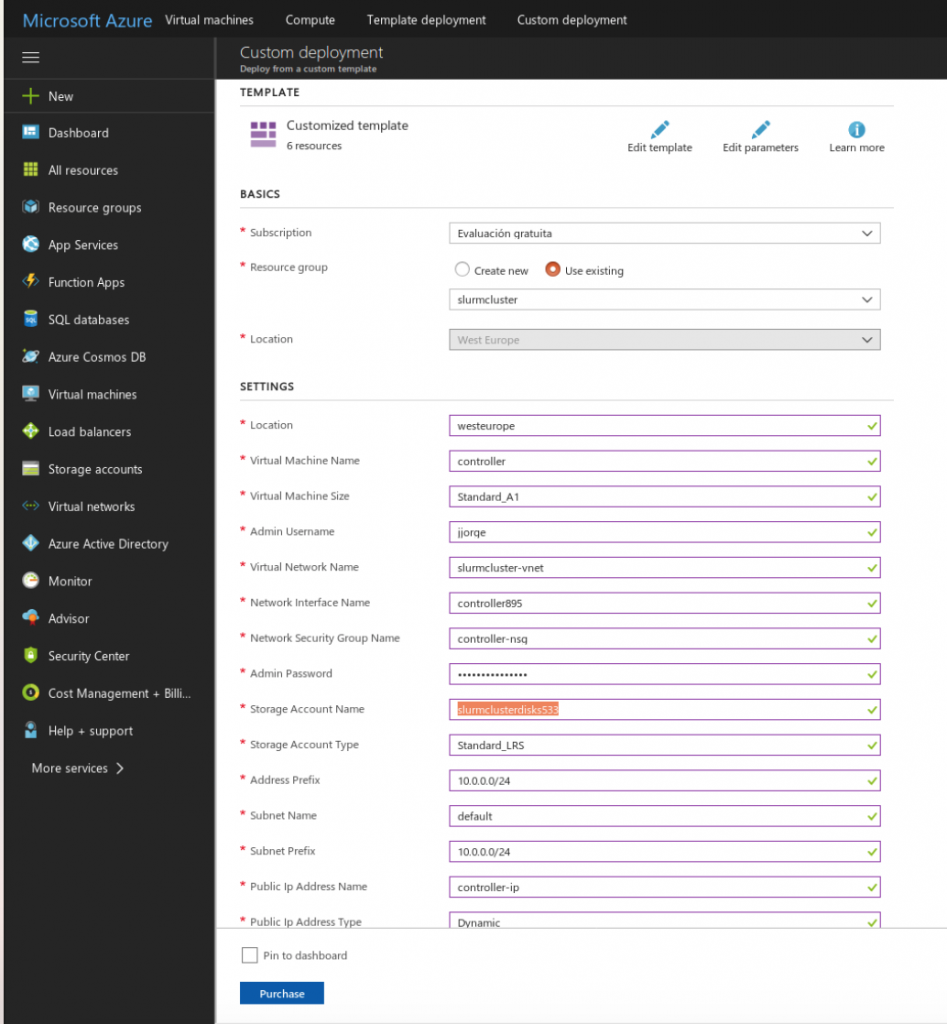
When we have uploaded these files, we should change some parameters for each instance, i.e: hostname, network settings, and so on. The next image shows the interface where we should change these values.
With these steps, we should configure the following nodes (creating them with the first template):
- controller: The main node that will manage the SLURM cluster (already deployed).
- compute0 and compute1: Compute nodes in the cluster.
- nasnode: The node that stores the shared files.
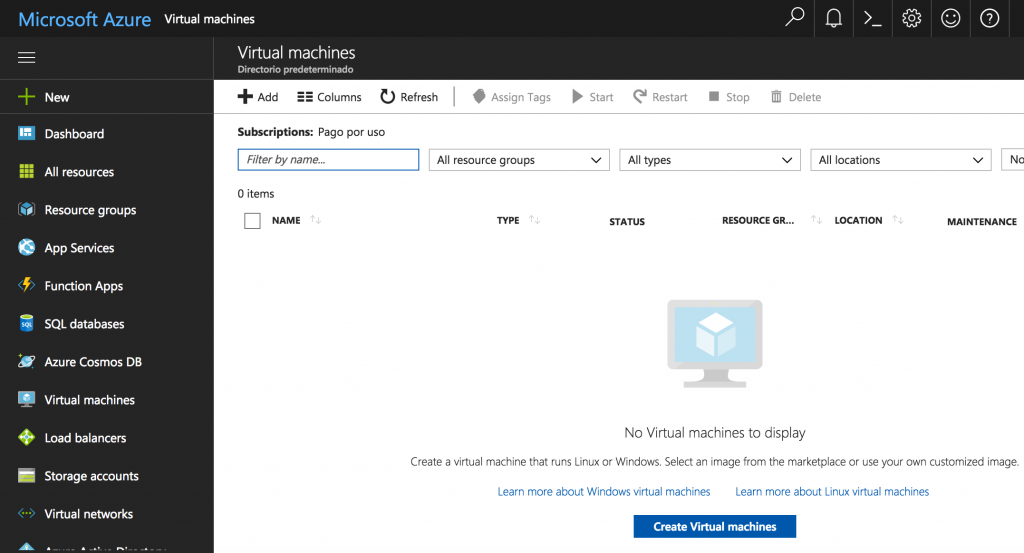
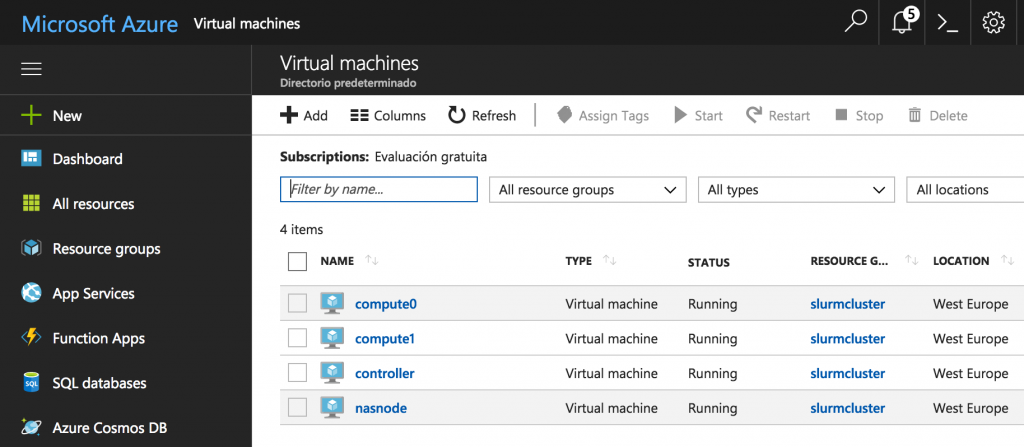
Due to restrictions related to the number of nodes in one region, we have created these four, the upper limit that the free account provides. After creating them, we should see the nodes up and running in the Azure’s interface, as it is shown underneath. Once this step is completed, we can move forward to the configuration of the network.
Setting up the communication
First of all, as the nodes should communicate each other through their names, we have to include in the file /etc/hosts the name and the IP address (it could be checked in the “Network” tab in Azure), with something similar to the following:
127.0.0.1 localhost

10.0.0.4 controller

10.0.0.5 compute0

10.0.0.6 compute1

10.0.0.8 nas

#---REST OF THE FILE
We can check if they can contact each other making ping from one node to another.
user@controller:~$ ping compute0

PING compute0 (10.0.0.5) 56(84) bytes of data.

64 bytes from compute0

 (10.0.0.5): icmp_seq=1 ...64 bytes from compute0

(10.0.0.5): icmp_seq=2 ...64 bytes from compute0

(10.0.0.5): icmp_seq=3 ...
Configuring root user
We should establish a password for root in all the nodes, creating a public key for the controller’s root and share it among nodes.
 jjorge@controller:~$ sudo su

root@controller:# cd

root@controller:# passwd

Enter new UNIX password:

Retype new UNIX password:

passwd: password updated successfully
Then, edite the file sshd_config:
root@controller:# sudo vi /etc/ssh/sshd_config

# ...Rest of the file#

 Replace this line

# PermitRootLogin prohibit-password

# For this one

PermitRootLogin yes

# ...Rest of the file
We have to do this on every node. After this, we generate the public key and it will be copied on the nodes.
root@controller:#¸ ssh-keygen
root@controller:# cp /root/.ssh/id_rsa.pub \/root/.ssh/authorized_keys
root@controller:# ssh nas "mkdir /root/.ssh"
root@controller:# scp /root/.ssh/id_rsa.pub \nas:/root/.ssh/authorized_keys
root@controller:# ssh compute0 "mkdir /root/.ssh"
root@controller:# scp
     /root/.ssh/id_rsa.pub
     compute0:/root/.ssh/authorized_keys
# ...The same with the other nodes...
After doing this, we are ready to install everything, starting with the NFS, that will be commented on the next post.